Practical Guide to How to Transfer Your Old iPhone to a New iPhone Easily in 2025
Transferring your old iPhone data to a new one can seem daunting, but with the right tools and methods, it’s a straightforward process. In 2025, Apple has streamlined the process for users by introducing various options to easily **transfer iPhone data**. This comprehensive guide will help you navigate through everything you need to know about **moving from old iPhone to new**, ensuring that you can set up your device with minimal hassles.
Understanding the iPhone Data Transfer Process
When you’re ready to set up your new iPhone, understanding the **iPhone data transfer process** is crucial. First, it’s essential to ensure that both your old and new devices are updated to the latest iOS versions. This leads to a more seamless transition and avoids issues related to incompatible software. You can choose to migrate using several methods, such as **iCloud backup restore, iTunes**, or the **iPhone migration tool**. Each option provides unique advantages, and the choice depends on your preferences and specific requirements for data transfer. For example, using **iCloud** allows for wireless migration, while **iTunes** facilitates a wired connection that may work faster for larger data sets.
Using iCloud to Transfer Data
One of the simplest methods for transferring data is to use **iCloud backup restore**. Begin by backing up your old iPhone to iCloud. Navigate to Settings > [your name] > iCloud > iCloud Backup, then tap ‘Back Up Now’. Once your old iPhone is backed up, power on your new iPhone and select ‘Restore from iCloud Backup’ during the setup process. Log into your Apple ID and choose the most recent backup to begin **copying contacts to new iPhone**, along with all other saved content. This method not only allows you to keep your data secure but also automatically syncs apps and other settings.
Transferring with iTunes
If you prefer using a computer, **transferring data using iTunes** is another practical option. To do this, connect your old iPhone to your computer and launch iTunes. Select your device, then click on ‘Back Up Now’. After the backup process completes, disconnect your old iPhone and connect your new device. During setup, select ‘Restore from iTunes Backup,’ choose the most recent backup, and let iTunes do the rest. This method is particularly useful for users who may need a complete backup stored locally on their computer, which can serve as an additional layer of safety for important files.
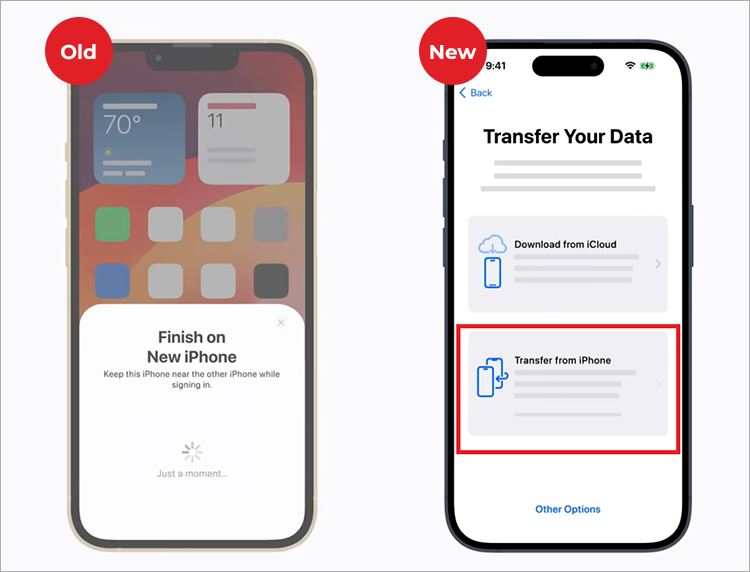
Exploring Alternative Methods to Transfer Data
Besides iCloud and iTunes, there are other efficient alternatives for users who want to **transfer iPhone data**. Apple’s Quick Start feature greatly simplifies the migration process. Simply place your old iPhone next to your new device, and follow the prompts that appear. Ensure both devices are updated and enable **Wi-Fi** for a seamless pairing. This method automatically supports the **transfer of messages, photos, and app data** without the need for complex setups.
Move Data Using Quick Start
To utilize the **Quick Start** feature, both devices must be running iOS 11 or later. When the Quick Start notification prompts on your old iPhone, simply select ‘Continue’. A unique animation will appear on your new iPhone for you to align the old one with. Continue following the on-screen instructions, ensuring you **enable data move on old iPhone**. This not only transfers your data but also helps you set up **Apple ID** and **Family Sharing** easily.
Transfer Files Securely with AirDrop
Another user-friendly option is using AirDrop for **transferring files with AirDrop**. This feature allows for quick file transfers without the need for extras such as cables or Wi-Fi. Simply open the files you wish to transfer on your old iPhone, tap the share icon, and select your new iPhone from the AirDrop menu. Ensure AirDrop is enabled on both devices, and you can swiftly **transfer notes from old iPhone** or even music without significant data loss. This option is particularly handy for moving **media files, contacts, or essential documents** that need immediate access on your new device.
Finalizing Your New iPhone Setup
Once you have transferred your data, it’s time to set up your new iPhone completely. Begin by ensuring that settings such as **Find My iPhone** and **Apple Pay** are correctly configured. Additionally, check your app settings to make sure everything is suitable and functioning as expected. This step not only enhances your **iphone user experience** but ensures your device is marketed for optimal performance.
Setting Up Family Sharing and Other Features
After completing the migration, you might want to explore **setting up Family Sharing**. This allows multiple users to share purchases from Apple Services, making it easier to manage subscriptions, purchases, and even location sharing among family members. To set this up, go to Settings > [your name] > Family Sharing. There, you can invite family members to join, ensuring everyone can enjoy shared access to Apple services.
Managing App Data and Permissions
Review permissions of apps on your new device to ensure **data privacy**. Some applications may require re-establishment of permissions after the initial setup. Delving into App settings allows for finer customization of permissions, thereby helping you maintain greater control over your data such as browsing history or location sharing. Don’t forget to check if any app needs updates or if any downloads doubled during the transfer to ensure it works without a hitch.
Conclusion
In conclusion, successfully **transferring iPhone settings** and data from your old iPhone to a new one is easily achievable with modern tools at your disposal. Whether you choose the iCloud backup, Quick Start method, or iTunes, each offers a user-friendly interface to simplify your experience. With these techniques, you can ensure your essential contacts, photos, and messages are carried over seamlessly and securely. For further questions about the **iPhone data transfer process**, do not hesitate to check Apple’s support resources for expert guidance and troubleshooting help. Happy switching!
Key Takeaways
- Utilize iCloud and iTunes options for transferring data securely.
- Make use of Quick Start for easy and fast settings migration.
- Ensure app settings and **permissions** are finely managed after transferring.
- Explore Family Sharing to enhance use across family members.
- Maintain data privacy throughout the transfer process.
FAQ
1. How do I ensure that my iCloud backup is complete before moving to a new iPhone?
To confirm your iCloud backup is complete, go to Settings > [your name] > iCloud > iCloud Backup. Make sure your old iPhone displays “Last backup: [date and time]” indicating it’s up to date. You can manually trigger a backup if necessary by clicking on ‘Back Up Now’.
2. Can I transfer my music without losing any of my playlists?
Yes! If you sync your music through iTunes or Apple Music, your playlists can be transferred during the backup process. Ensure you follow the method for **backup old iPhone data** or use the direct transfer options available to make sure your playlists are intact.
3. What should I do if I face errors during the transfer process?
If you encounter errors, try restarting both devices and ensuring they are on the latest iOS. Checking your storage capacity on both iPhones and reassuring a stable internet connection can eliminate common issues during the **iPhone migration process**. Furthermore, consult Apple’s official support if problems persist.
4. How do I transfer my contacts securely from my old iPhone?
Contacts can be migrated securely via iCloud. After ensuring you have an iCloud backup from your old phone, simply log in with your Apple ID on the new device and sync your contacts. Alternatively, utilizing **AirDrop** is another secure way to share contacts between devices.
5. Is it possible to transfer only specific apps instead of all data at once?
Yes, you can manually download specific apps on your new iPhone from the App Store. If you’d like to keep your settings for certain apps, consider using iCloud or iTunes to back up and selectively restoring data as needed.